How to Install Jupyter Notebook: Step-by-Step Guide for Windows (2026)

Table Of Content
- What Is Jupyter Notebook? (Direct Answer)
- Why Jupyter Notebook Is So Important in 2026
- Methods to Install Jupyter Notebook in Windows
- Method 1: How to Install Jupyter Notebook Using Anaconda (Recommended)
If you’re starting your journey in Python, data science, or machine learning, one of the very first tools you’ll need is Jupyter Notebook.
But here’s the reality: many beginners struggle with installation.
You may have already faced issues like the following:
- Python is not being recognised
- pip errors
- Jupyter Notebook not launching
- Confusion between Anaconda and pip
That’s exactly why this guide exists.
This blog is a complete, step-by-step guide on how to install Jupyter Notebook in Windows, designed specifically for beginners in 2026.
By the end, you will:
- Learn how to install Jupyter Notebook using Anaconda and pip
- Understand which method is best for you
- Learn how to install TensorFlow in Jupyter Notebook
- Fix common installation errors
- Understand how Jupyter fits into real-world careers
What Is Jupyter Notebook? (Direct Answer)
Jupyter Notebook is an open-source web-based platform that allows you to write and run code in an interactive environment.
*docs.jupyter.org
It is widely used for:
- Python programming
- Data analysis
- Machine learning
- AI experimentation
- Research and education
Unlike traditional coding tools, Jupyter Notebook lets you combine:
- Code execution
- Visual outputs (charts, graphs)
- Text explanations
—all in a single interface.
Why Jupyter Notebook Is So Important in 2026
In today’s AI-driven world, tools like Jupyter Notebook are not optional—they are essential.
Key reasons professionals use Jupyter:
- Supports major programming languages (Python, R, Julia)
- Works seamlessly with AI libraries like TensorFlow, PyTorch
- Ideal for rapid prototyping and experimentation
- Used in industries like finance, healthcare, marketing, and tech
Real-world example:
A data scientist can:
- Import a dataset
- Clean and transform data
- Visualise insights
- Train machine learning models
—all within a single notebook.
Methods to Install Jupyter Notebook in Windows
There are two primary methods:
| Method | Best For | Pros | Cons |
| Anaconda | Beginners | Easy setup, includes libraries | Large installation size |
| pip | Intermediate users | Lightweight, flexible | Requires manual setup |
Method 1: How to Install Jupyter Notebook Using Anaconda (Recommended)
This is the most beginner-friendly method and highly recommended if you’re new to Python or data science.
Step 1: Download Anaconda
- Visit the official Anaconda website
- Download the latest version for Windows (Python 3.x)
- Choose the 64-bit installer
Step 2: Install Anaconda
Follow these steps carefully:
- Open the downloaded installer
- Click Next → Agree
- Select Just Me (recommended)
- Choose installation location
- Optionally enable Add Anaconda to PATH
Step 3: Complete Installation
Once installation finishes:
- Open Anaconda Navigator
- Locate Jupyter Notebook
- Click Launch
Step 4: Launch via Command Prompt (Optional)
You can also launch Jupyter Notebook manually:
jupyter notebook
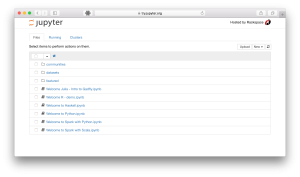
What Jupyter Notebook Looks Like
Here’s how Jupyter Notebook looks post installation:
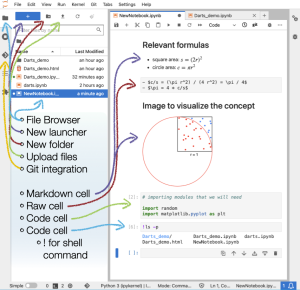
After launching:
- A browser window opens
- You see a file directory
- You can create a new notebook
- Code runs inside cells
Method 2: How to Install Jupyter Notebook Using pip
If you already have Python installed, this method is faster and more flexible.
Step 1: Install Python
- Download Python 3.8 or above
- Ensure Add Python to PATH is checked
Step 2: Open Command Prompt
Press:
Step 3: Install Jupyter Notebook
Run:
Step 4: Launch Jupyter Notebook
Advanced Setup: Virtual Environments (Recommended in 2026)
Modern best practices recommend using virtual environments.
Why?
Here’s why:
- Avoid dependency conflicts
- Manage multiple projects easily
- Keep environments isolated
Create a virtual environment:
Here’s how:
Activate it:
Then install Jupyter:
How to Install TensorFlow in Jupyter Notebook
Many learners immediately want to move into AI after installation.
Here’s how to install TensorFlow.
Step 1: Install TensorFlow
Step 2: Verify Installation
Open Jupyter Notebook and run:
Step 3: Add TensorFlow Kernel (Optional Advanced Step)
If using multiple environments:
This allows you to switch environments inside Jupyter.
Free Learning Resource (Highly Recommended)
Many learners install tools but don’t know how to use them effectively.
A smart next step is to explore a free introductory course in Python or Data Science. You can check out this one on Python for Data Analysis by Jaro Education.
This helps you:
- Practice coding inside Jupyter Notebook
- Understand real-world workflows
- Build foundational skills before advanced topics
Common Errors While Installing Jupyter Notebook (And Fixes)
Even in 2026, installation errors are extremely common.
1. Python Not Recognised
Fix:
2. pip Not Working
3. Jupyter Notebook Not Opening
Or upgrade:
4. Permission Errors
5. Port Already in Use
Use a different port:
Real-World Applications of Jupyter Notebook
Understanding installation is just the beginning.
Where Jupyter is used:
- Data analysis (Pandas, NumPy)
- Data visualisation (Matplotlib, Seaborn)
- Machine learning (Scikit-learn, TensorFlow)
- Business analytics
- Academic research
Example Scenario:
A business analyst uses Jupyter Notebook to:
- Analyse sales data
- Create dashboards
- Predict future demand
These will help you transition from setup to skill-building.
Free Courses


FinTech 101: Digital Banking & Payments


pip vs Anaconda: Detailed Comparison
Here’s a detailed comparison of pip vs Anaconda:
| Feature | Anaconda | pip |
| Ease of use | Very easy | Moderate |
| Setup time | Longer | Faster |
| Libraries included | Yes | No |
| Flexibility | Moderate | High |
| Best for | Beginners | Developers |
What to Do After Installing Jupyter Notebook
Installing Jupyter Notebook is only the first step.
Recommended Learning Path:
- Learn Python fundamentals
- Practice using Jupyter Notebook
- Work with datasets
- Learn Pandas and NumPy
- Explore machine learning
- Build projects
Career Opportunities After Learning Jupyter Notebook
Mastering Jupyter Notebook opens doors to several career paths.
Roles you can pursue:
- Data Analyst
- Machine Learning Engineer
- AI Engineer
- Business Analyst
- Research Analyst
For working professionals:
Jupyter helps in:
- Automating reports
- Analysing large datasets
- Making data-driven decisions
Pro Tips for Beginners (2026)
Here are some pro tips for you if you’re a beginner:
- Always use virtual environments
- Keep Python updated
- Practice daily in Jupyter
- Work on real datasets
- Don’t rely only on theory
Conclusion
Learning how to install Jupyter Notebook is your gateway into data science and AI.
To summarise:
- Use Anaconda for simplicity
- Use pip for flexibility
- Install TensorFlow for machine learning
- Focus on learning, not just setup
Once your environment is ready, the real journey begins—building projects and solving real problems.
Frequently Asked Questions

Related Courses
Explore our programs
 Admission Closed
Post Graduate Certification Programme in Business Analytics & Artificial Intelligence (AI) Applications
 Admission Closed
Professional Certificate Programme in Applied Analytics and Gen AI for Business Decisions
 Admission Open
Certificate Course in Applications of AI for Business Managers (Batch 01)
Find a Program made just for YOU
We'll help you find the right fit for your solution. Let's get you connected with the perfect solution.
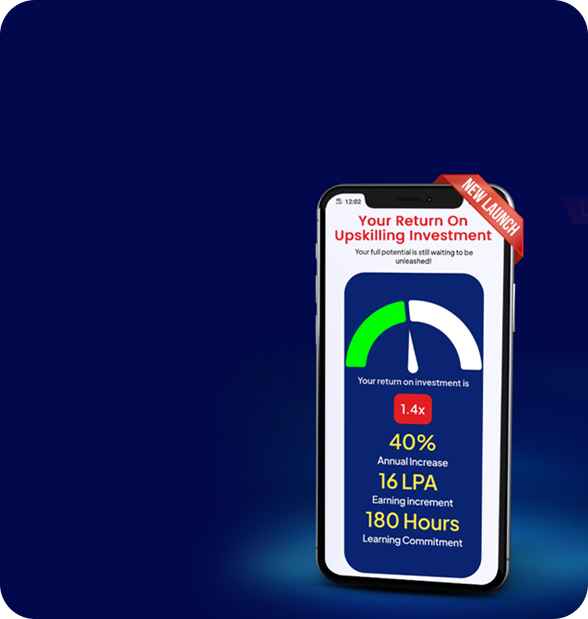
Is Your Upskilling Effort worth it?

Are Your Skills Meeting Job Demands?

Experience Lifelong Learning and Connect with Like-minded Professionals

