Arduino Uno Programming Language: How to Write Your First Code
Table Of Content
- What Is the Arduino Programming Language?
- Understanding Arduino Basic Programming Language Concepts
- Setting Up the Arduino IDE for Arduino Uno Programming Language
- Writing Your First Sketch in Arduino Uno Programming Language
If you have ever wanted to build your own smart devices, automate a small project, or simply explore the exciting world of embedded systems, the Arduino Uno is the perfect starting point. At the heart of every Arduino project is the arduino programming language — a beginner-friendly, yet powerful tool that makes hardware programming accessible to everyone, from students and hobbyists to professional engineers.
In this comprehensive guide, we will walk you through everything you need to know about the arduino uno programming language, from understanding what it is and setting up your environment to writing your very first sketch. Whether you are completely new to coding or already familiar with programming concepts, this blog will help you get your Arduino Uno up and running in no time.
What Is the Arduino Programming Language?
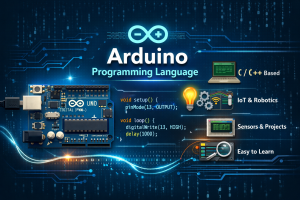
The arduino programming language is based on a simplified version of C/C++. It was specifically designed to make microcontroller programming approachable for beginners while still offering the depth needed for complex projects. Unlike many other programming environments that require extensive setup and low-level knowledge, Arduino abstracts away much of the complexity, allowing you to focus on building your ideas.
At its core, the Arduino language is a set of C/C++ functions and libraries that interact directly with the hardware of the board. You write code in a text editor, compile it, and then upload it to the microcontroller. The language is open-source and has an enormous community, which means help, tutorials, and ready-made libraries are always just a search away.
Arduino is not just a programming language — it is an entire ecosystem of hardware and software. If you are interested in how programming bridges the gap between technology and real-world applications, you might also enjoy exploring Top 10 Real-World Applications of IoT, which shows how embedded systems like Arduino are powering the Internet of Things revolution.
Understanding Arduino Basic Programming Language Concepts
Before you write your first line of code, it helps to understand a few fundamental concepts of the arduino basic programming language. These building blocks will appear in virtually every project you work on.
1. Sketches
In Arduino terminology, a program is called a sketch. Every Arduino sketch has two mandatory functions: setup() and loop(). The setup() function runs once when the board powers on, while loop() runs continuously thereafter. This simple structure keeps the arduino basic programming language intuitive for newcomers.
2. Variables and Data Types
Like any programming language, Arduino uses variables to store data. Common data types include int (integers), float (decimal numbers), bool (true/false), char (single characters), andString (text). Declaring a variable is straightforward:
int ledPin = 13; // Integer variablefloat temperature = 0.0; // Decimal variable
bool isOn = true; // Boolean variable
3. Functions
Functions allow you to group reusable blocks of code. Arduino comes with many built-in functions such as digitalWrite(), digitalRead(), analogWrite(), and delay(). You can also write your own custom functions to keep your sketches organized and readable.
4. Control Structures
The arduino basic programming language supports standard control structures including if/else, for loops, while loops, and switch/case statements. These let you create logic, repeat actions, and respond to sensor inputs in your projects.
5. Libraries
One of the biggest strengths of the Arduino ecosystem is its library support. Libraries extend the functionality of the arduino programming language, providing pre-written code for common components such as LCD screens, servo motors, Wi-Fi modules, and sensors. You can import a library with a single line of code.
Setting Up the Arduino IDE for Arduino Uno Programming Language
The Arduino Integrated Development Environment (IDE) is where you write, compile, and upload your sketches. Setting it up is straightforward and free.
Step 1: Download the Arduino IDE
Visit the official Arduino website and download the latest version of the Arduino IDE for your operating system (Windows, macOS, or Linux). The IDE is lightweight and installs quickly.
Step 2: Install Drivers
On Windows, you may need to install USB drivers for the Arduino Uno. The IDE installer usually handles this automatically. On macOS and Linux, the board is typically recognized without additional drivers.
Step 3: Connect Your Arduino Uno
Use a standard USB Type-B cable to connect your Arduino Uno to your computer. Open the IDE, navigate to Tools > Board, and select Arduino Uno. Then go to Tools > Port and select the port your board is connected to.
Step 4: Familiarize Yourself with the IDE
The IDE has a toolbar at the top with buttons for verifying (compiling) your sketch, uploading it to the board, and opening the serial monitor. The main area is the code editor, and the black console at the bottom shows compilation output and error messages.
Writing Your First Sketch in Arduino Uno Programming Language
The traditional first project for any Arduino beginner is the Blink sketch — making the built-in LED on pin 13 blink on and off. It is simple, requires no external components, and teaches you the fundamental structure of the arduino uno programming language.
The Blink Sketch
// Blink - Your First Arduino Sketch
// Turns the built-in LED on for 1 second, then off for 1 second


void setup() {
  // Initialize digital pin 13 as an output
  pinMode(13, OUTPUT);
}


void loop() {
  digitalWrite(13, HIGH);  // Turn LED ON
  delay(1000);             // Wait 1000 milliseconds (1 second)
  digitalWrite(13, LOW);   // Turn LED OFF
  delay(1000);             // Wait 1 second
}
Breaking Down the Code
Let’s understand each part of this sketch:
- void setup() — Runs once. We use pinMode() to configure pin 13 as an OUTPUT, meaning the board will send voltage through that pin.
- void loop() — Runs forever. Inside it, we use digitalWrite(13, HIGH) to switch the LED on and digitalWrite(13, LOW) to turn it off.
- delay(1000) — Pauses the program for 1000 milliseconds. This controls how long the LED stays on or off.
This is the foundation of the arduino uno programming language in action. Every more complex project builds on these same principles — initialize hardware in setup(), then control it in loop().
Reading Sensor Data: Expanding Your Arduino Programming Language Skills
Once you are comfortable with digital output, the next step is reading input from the physical world using sensors. The Arduino Uno has 14 digital pins and 6 analog input pins (A0–A5), making it ideal for connecting a wide variety of components.
Reading a Button Press
int buttonPin = 7;
int ledPin = 13;


void setup() {
  pinMode(buttonPin, INPUT);
  pinMode(ledPin, OUTPUT);
}


void loop() {
  int buttonState = digitalRead(buttonPin);
  if (buttonState == HIGH) {
    digitalWrite(ledPin, HIGH); // LED ON when button pressed
  } else {
    digitalWrite(ledPin, LOW);  // LED OFF when button released
  }
}
Here is how you read a digital input from a push button connected to pin 7:
Reading Analog Sensor Data
Analog sensors like temperature sensors or potentiometers return values between 0 and 1023 via the Arduino’s ADC (Analog-to-Digital Converter). You read them like this:
int sensorPin = A0;


void setup() {
  Serial.begin(9600); // Start serial communication
}


void loop() {
  int sensorValue = analogRead(sensorPin);
  Serial.println(sensorValue); // Print value to Serial Monitor
  delay(500);
}
The Serial Monitor is an incredibly useful tool in the arduino programming language ecosystem — it lets you print values from your board to your computer screen for debugging and data visualization.
Free Courses


Common Mistakes to Avoid in Arduino Basic Programming Language
Even experienced developers make mistakes when starting out with a new platform. Here are some common pitfalls to watch out for in the arduino basic programming language:

- Forgetting semicolons: Every statement in Arduino code must end with a semicolon (;). Missing one is a frequent source of compilation errors.
- Wrong pin mode: If you forget to set a pin’s mode using pinMode() in setup(), your hardware may not respond correctly.
- Integer overflow: The int data type on Arduino holds values from -32,768 to 32,767. For larger numbers, use long.
- Blocking delays: Relying heavily on delay() can make your program unresponsive. For advanced projects, use the millis() function instead.
- Neglecting power limits: Each Arduino pin can only supply 40mA of current. Always use resistors with LEDs and be mindful of power when connecting components.
Conclusion
The arduino uno programming language is one of the most approachable and rewarding places to start your journey in hardware programming. With a simple, structured syntax based on C/C++, it removes the steep learning curve traditionally associated with embedded systems and puts the power of building real-world devices directly into your hands.
From the basics of variables and functions to writing your first Blink sketch and reading sensor data, every concept you learn builds a solid foundation for more advanced work in IoT, robotics, and automation. The arduino basic programming language is not just for beginners either — professionals use it daily to prototype products, build smart systems, and bring creative ideas to life.
As you grow your skills, remember that pairing practical experience with formal education accelerates your career significantly. Jaro Education partners with India’s top institutions — including IITs and IIMs — to offer programs that can help you turn your passion for technology into a rewarding professional career.
Explore all programs and resources at Jaro Education and take the next step in your learning journey today.
Frequently Asked Questions

Related Courses
Explore our programs


Find a Program made just for YOU
We'll help you find the right fit for your solution. Let's get you connected with the perfect solution.

Is Your Upskilling Effort worth it?

Are Your Skills Meeting Job Demands?

Experience Lifelong Learning and Connect with Like-minded Professionals

